फलकम्:Infobox map
| This template has been revised. Additional documentation will be added soon. If you notice any bugs please leave a note on the talk. |
This helper template provides a way to display a map in an Infobox. Optionally a location marker can be included.
Usage
[सम्पादयतु]Parameter descriptions
[सम्पादयतु]| Field name | Description |
|---|---|
map |
The name of the map to be displayed. This is the only required parameter. |
map_width |
The width of the map image to be displayed. For example map_width=220 and not map_width=220px. The default width is 220px.
|
relief |
Selects a relief map when assigned any value. This only works when the geographical coordinates method is used and then only for a few maps. See Map display methods. |
map_alt |
Alt text for the map. A visually impaired reader who uses a screen reader will have access to this text. See WP:ALT. |
map_caption |
The caption that appears below the map if one is required. |
mark |
The image file that will be used to mark the location on the map. The default is Red pog.svg. See below. |
mark_width |
The width of the marker image to be displayed. For example mark_width=8 and not mark_width=8px. The default width is 8px.
|
label |
A text message that will be displayed next to the marker. This does not work with the compatibility method. |
label_position |
The position of a label with respect to the marker. Valid values are left, right, top, bottom and none.
|
latlong |
Specifies the latitude and longitude of the location when the geographical coordinates method is used. This value must be specified as a signed decimal degree. See below. |
xy |
Specifies the position of the location marker when the X,Y method for map display is used. The coordinates of the marker in pixels based on a map width of 1000 pixels. The template will scale these values for proper display. See below. |
x%y% |
Specifies the position of the location marker when the X%,Y% method for map display is used. x% specifies the percentage of the distance across the image from the left edge and y% specifies the percentage of the distance down from the top edge. See below.
|
Map display methods
[सम्पादयतु]Any image of a map showing the location of the protected area can be used. There are two methods which can display a location mark to on a map.
Geographical coordinates method
[सम्पादयतु]A marker can be superimposed if one of a set of special map templates are used. If a valid map name from one of these templates is supplied the template will attempt to use this method. To display a marker, the geographic coordinates must be supplied using the parameters lat, and long. The marker will not be displayed if the {{coord}} template is used. See the documentation for {{Location map}}. The parameters for this template map to a subset of the parameters for Location map.
A tool which generates lists of maps can be found here. All of the names begin with the words "Location map" followed by the area covered. The value you need to assign to the parameter, map, is the area name. The map template for the for Alberta, Canada is Location map Canada Alberta. In this case specify map=Canada Alberta. For example:
| Dry Island Buffalo Jump Provincial Park |
|---|
{{Infobox
| above = Dry Island Buffalo Jump Provincial Park
| image2 = {{Infobox map
           | map         = Canada Alberta
           | map_alt     = Located in south central Alberta, which is in western Canada.
           | map_caption = Location of Dry Island Buffalo Jump in Alberta, Canada
           | map_width   = 200
           | label       = Dry Island Buffalo Jump
           | lat         = 51.9438889
           | long        = -112.9636110
           }}
}}
The label is optional. By default it is usually displayed to the left of the mark.
Many of the maps for large areas in this set of templates use equirectangular projection. Large scale maps, using this projection, look different than those with which most are familiar. However, there are some large area maps that that use a familiar map projection. A list of some of the map templates that do not use equirectangular projection can be found here.
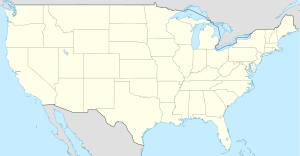
| USA Equirectangular projection |
USA2 Equidistant conic projection |
USA relief Equidistant conic projection using shaded relief |

|

|

|
X,Y coordinate method
[सम्पादयतु]The values to assign to the x and y parameters are determined using a map image with a width of 1000 pixels. Using the upper left hand corner as the origin determine the pixel coordinates for the mark. Probably the easiest way is to download the file to your computer and use graphics software to scale the image. Two of the many programs that can perform this task are GIMP and XnView; both are freeware. This template scales these values so that the mark will appear in the proper location on a map image of any size.
xis the pixel offset of the mark from the left edge of the map image based on a image 1000px wide.yis the pixel offset of the mark from the top edge of the map image based on a image 1000px wide.
Any size map image can be displayed by setting map_width to a different value.
| Old Faithful | |
|---|---|
{{Infobox
| above = Old Faithful
| image2 = {{Infobox map
           | map         = Old Faithful area.png
           | map_alt     = Map shows Old faithful is near other geysers, a visitor center and lodging.
           | map_caption =
           | map_width   = 200
           | x           = 679
           | y           = 630
           }}
}}
Old Faithful is located at x=679 pixels from the left of the map image 1000 pixels wide and y=630 pixels from the top. You can experiment by pasting this example code into a sandbox and substituting your own values.
Note that the mark will be centered over the location and that this differs from the output generated by {{Superimpose}}.
Compatibility method
[सम्पादयतु]This method exists for backwards compatibility when updating older templates. The parameters are pixel_x and pixel_y and correspond to the x and y parameters of the template Superimpose. These values should be derived using an image with the same dimensions as the image to be displayed in the infobox. See {{Superimpose}} for additional details. Using a map image of the size to be displayed:
- pixel_x is the pixel offset for the left edge of the marker image from the left edge of the map image.
- pixel_y is the pixel offset for the top edge of the marker image from the top edge of the map image.
The upper left hand corner of marker image will be displayed at the coordinates specified. To center the marker subtract half the width of the marker from pixel_x and half the height of the marker from pixel_y.
This method is not recommend. Changing the size of the map image without adjusting the marker coordinates will generate unintended output.
Display any map image
[सम्पादयतु]A third option allows the display of any map image without a location mark being added.
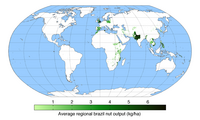
| Average regional brazil nut output (kg/ha) | |
|---|---|
{{Infobox
| above =
| image2 = {{Infobox map
           | map         = Braziloutput.png
           | map_alt     = A world map showing regions that produce Brazil nuts.
           | map_caption =
           | map_width   = 200
           }}
}}
Geographical coordinates
[सम्पादयतु]The template {{decdeg}} can be used to allow additional parameters for the entry of geographical coordinates. The template can be used with or without named parameters. If the unnamed option is used all parameter must be supplied but they can be void. The following markup can be used to allow the template user to enter coordinates. These parameters names are recommended by WikiProject Geographical coordinates.
| lat  = {{decdeg|{{{lat_d|}}}|{{{lat_m|}}}|{{{lat_s|}}}|{{{lat_NS|}}} }}
| long = {{decdeg|{{{long_d|}}}|{{{long_m|}}}|{{{long_s|}}}|{{{long_EW|}}} }}
To display coordinates in the Infobox two methods can be used. The template {{Infobox coord}} can be used to display coordinates entered using the method discussed above. If the X,Y method is used to display a marker then the template {{coord}} can be used. For examples of coordinate entry see coordinate examples.
See also
[सम्पादयतु]- {{Location map}}
- {{Superimpose}}


